How to Dehydrate Oranges in the Oven: Step-by-Step Guide
There’s something magical about turning simple, everyday items into something beautiful and useful, and learning how to dehydrate oranges in the oven is a perfect example of that. Not only is this a practical way to preserve oranges, but it’s also a fun and frugal way to create stunning decorations for the holidays. From garlands and ornaments to potpourri and centerpiece accents, dried orange slices add a cozy, rustic charm to your home without breaking the bank. Plus, there’s no need for a fancy dehydrator—your trusty oven will do the job beautifully.
Whether you’re crafting holiday decor, enhancing your favorite tea, or looking for a healthy snack, dehydrating oranges is a rewarding project that fills your home with the warm, citrusy scent of the season. In this post, I’ll guide you through the process step by step, so you can enjoy this easy and creative DIY!
This post may contain affiliate links, which means that if you buy a suggested product, I will earn a small commission, at no extra cost to you. For more information, see my disclosure page.
Why Dehydrate Oranges?
Dehydrating oranges not only extends their shelf life but also enhances their versatility. Here are a few reasons why you might want to dehydrate oranges:
- For Cooking and Baking: Use dried oranges in recipes for a tangy citrus flavor.
- Natural Decorations: Create festive garlands or ornaments.
- Fragrant Additions: Add to potpourri mixes or simmer pots for a refreshing scent.
- Nutritious Snacks: Enjoy them as a healthy, chewy snack.
What You’ll Need
Before starting, gather these tools and ingredients:
- Fresh oranges (choose firm, blemish-free ones). Two medium to large oranges will yield 20-22 1/8″ slices.
- A sharp knife or mandoline
- Parchment paper
- Baking sheets
- Oven
Prepare the Oranges
- Wash and Dry
Rinse the oranges under cold water to remove any dirt or residue. Pat them dry with a clean towel. - Slice Evenly
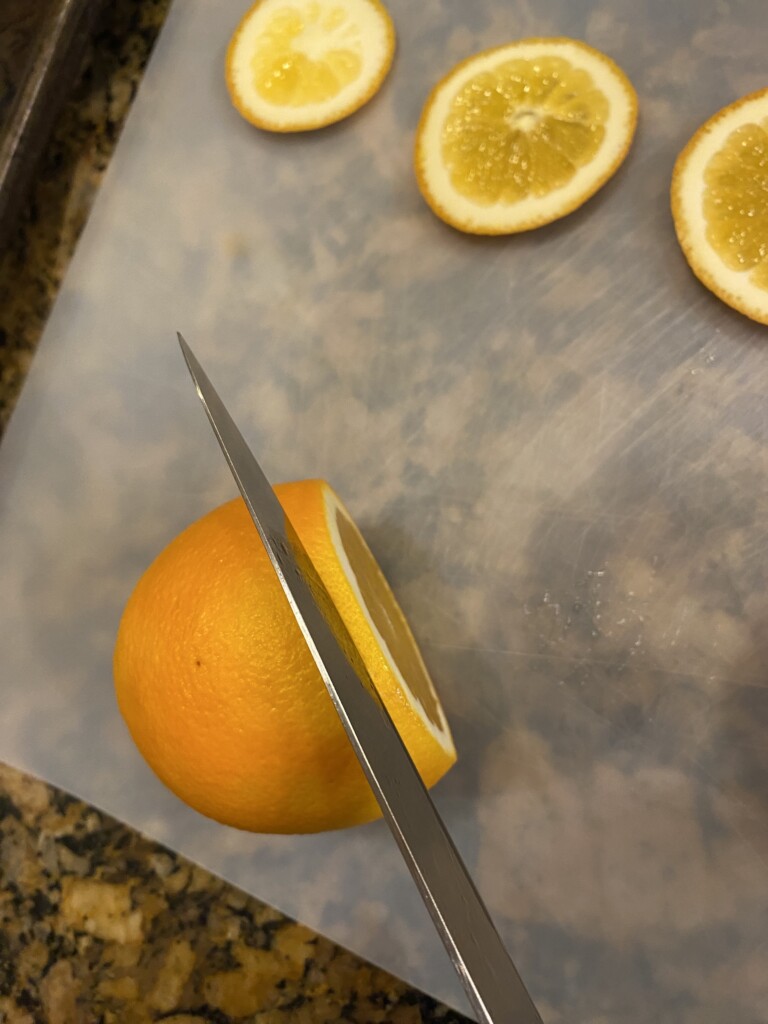
- Use a sharp knife or mandoline to slice the oranges into thin, even rounds about 1/8 to 1/4 inch thick. Any thicker than this and it will take them longer to dry out.
- Uniform thickness ensures even drying.
- Remove Seeds
If your orange slices have seeds, gently remove them with the tip of a knife.
Preheat the Oven
- Set your oven to the lowest temperature, usually around 200°F (93°C).
- If your oven doesn’t go that low, use the “Warm” setting.
Arrange the Slices
- Line Baking Sheets
- Place parchment paper on the baking sheets to prevent sticking.
- Lay Out the Orange Slices
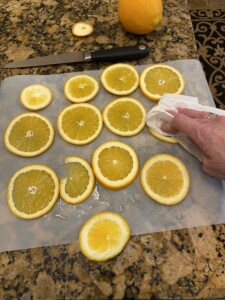
- Arrange the slices in a single layer, ensuring none overlap.
- Overlapping can lead to uneven drying and longer drying times.
- Take a paper towel and blot each orange slice on both sides to remove as much moisture as possible. This will help in the dehydrating time.
- Optional Sweetening or Spicing
- Sprinkle sugar or spices over the slices if desired for added flavor.

Dry the Oranges
- Bake Low and Slow
- Place the trays in the oven.
- Dry the oranges for 4–6 hours, flipping them every 45 minutes for even drying and to prevent burning.
- Check Progress
- The oranges are done when they feel dry to the touch but are still slightly pliable.
- If they’re brittle, they’ve over-dried.
Cool and Store
- Cool Completely
- Let the dried orange slices cool on the trays.
- Store Properly
- Place the slices in an airtight container or vacuum-sealed bag.
- Store them in a cool, dark place for up to 6 months.
Tips for Success
- Use a Convection Setting: If your oven has a convection option, it can help circulate air and speed up drying.
- Monitor Closely: Keep an eye on the slices during the last hour to prevent over-drying.
- Drying Time Variations: Drying time may vary depending on your oven and the thickness of the slices.
Creative Uses for Dried Orange Slices
- Decor: Use as ornaments, wreath accents, or garland pieces. Just poke a hole in the soft part of the orange slice and run some jute string through it, making it easy to hang.
- Culinary: Brew them in tea, garnish cocktails, or add to baked goods.
- Fragrance: Toss into simmering water with cinnamon sticks for a cozy home scent.
- Gifting: Include in homemade gift baskets with other dried fruits or spices.
- Add to packages: They can give your gift wrapped package a natural, personalize touch.
Dehydrating oranges in the oven is more than just a cost-effective way to preserve this delicious fruit; it’s a small but meaningful way to embrace simplicity and resourcefulness. Whether you’re decorating your home, treating yourself to a homemade snack, or preparing thoughtful gifts for loved ones, dried orange slices bring a touch of beauty and usefulness to your day-to-day life and they make wonderful decor items reminiscent of an old-fashioned holiday.
By taking the time to learn how to dehydrate oranges in the oven, you’re not just saving money—you’re creating something special from the ordinary. That’s what living frugally is all about: making the most of what you have and finding joy in the little things. I hope you enjoy the process and all the creative ways to use your dried oranges!
Have you tried dehydrating oranges in the oven? I’d love to hear how you use your dried orange slices—share your tips and creative ideas in the comments
For more money-saving tips and strategies, be sure to subscribe to our newsletter at Love to Frugal! You can also follow me on Pinterest, Facebook & Instagram for even more money saving, frugal living tips!
Other posts you may be interested in:
Frugal Christmas Decorating Ideas For A Festive Holiday Home
Simple Ways To Celebrate A Debt Free Christmas
How To Get Into The Christmas Spirit


